
关于 linkedin-profile
linkedin-profile 是基于 Apify 的 API,供开发者和数据流程将 LinkedIn 公开个人资料 URL 转为结构化 JSON。它支持批量处理,并返回一致的职业、教育及个人资料记录。
主要功能
- 01按 URL 获取公开个人资料
- 02并行处理多个资料 URL
- 03返回标题、地点和当前职位
- 04包含工作经历和教育经历
- 05提供关注者数量和个人资料链接
适用场景
- 01批量补充公开个人资料 URL 的信息
- 02汇总工作与教育经历
- 03将个人资料记录载入 CRM 或数据库
MCP 相关
通过 Apify 托管的 MCP 服务作为工具提供。README 介绍了在 Claude、Cursor、ChatGPT 等 MCP 客户端中的配置方式。
配置
远程服务无需本地安装。选择你使用的客户端,复制配置或使用一键安装。
https://mcp.apify.com/?tools=johnvc/linkedin-profile-apiclaude mcp add --transport http johnisanerd-linkedin-profile https://mcp.apify.com/?tools=johnvc/linkedin-profile-api{"mcpServers":{"johnisanerd-linkedin-profile":{"type":"http","url":"https://mcp.apify.com/?tools=johnvc/linkedin-profile-api"}}}在 Cursor 中打开{"servers":{"johnisanerd-linkedin-profile":{"type":"http","url":"https://mcp.apify.com/?tools=johnvc/linkedin-profile-api"}}}在 VS Code 中打开{"mcpServers":{"johnisanerd-linkedin-profile":{"type":"http","url":"https://mcp.apify.com/?tools=johnvc/linkedin-profile-api"}}}{"mcpServers":{"johnisanerd-linkedin-profile":{"serverUrl":"https://mcp.apify.com/?tools=johnvc/linkedin-profile-api"}}}命令在终端中运行;JSON 粘贴到对应客户端的 MCP 配置后重启。需要授权的服务会在首次连接时提示登录。
工具
详细介绍
👤 LinkedIn Profile API:将公开个人资料转换为结构化 JSON
使用 LinkedIn Profile API 的最高效、可靠且对开发者友好的方式。
Actor 页面: apify.com/johnvc/linkedin-profile-api 输入架构: apify.com/johnvc/linkedin-profile-api/input-schema
发送一个或多个公开的 LinkedIn 个人资料 URL,即可为每个人获取一行整洁的 JSON 数据:姓名、标题、位置、当前公司和职位、工作经历、教育经历及关注者数量。它采用 API 优先设计,并已做好 MCP 接入准备,因此你可以通过 Python 调用,也可以将其作为工具交由 AI Agent 使用。
视频演示
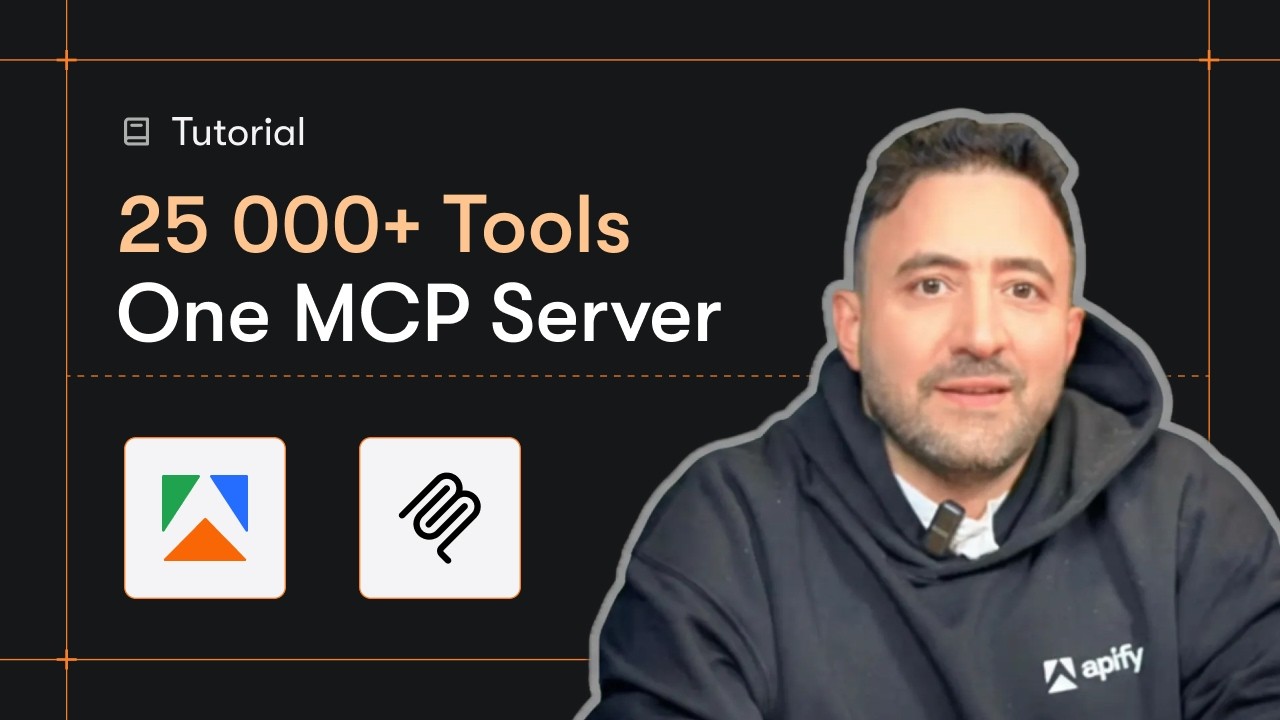
快速开始
前提条件
- Python 3.11 或更高版本
- Apify 账户和 API 密钥(在此免费获取密钥)
-
克隆代码库
git clone https://github.com/johnisanerd/Apify-LinkedIn-Profile-API.git cd Apify-LinkedIn-Profile-API -
使用 UV 安装依赖项
# Install UV if you do not have it: curl -LsSf https://astral.sh/uv/install.sh | sh # Install project dependencies: uv sync -
配置 API 密钥
cp .env.example .env # Edit .env and add your Apify API key # Get your free API key at: https://apify.com?fpr=9n7kx3 -
运行示例
uv run python linkedin-profile-api-example.py
替代方法:直接设置 API 密钥
export APIFY_API_TOKEN="your_api_key_here"
uv run python linkedin-profile-api-example.py
为什么使用这个 LinkedIn Profile API?
输入 URL,输出结构化数据。 你无需接触任何采集基础设施。传入公开个人资料 URL,即可获取字段扁平、格式一致的数据,可直接载入表格、数据库或 CRM。
适合批量处理。 每次运行最多可发送 1000 个个人资料 URL。它们会并行采集,并各自返回一行数据,因此丰富名单数据只需调用一次。
按个人资料付费。 按返回的个人资料计费,不收取每次运行的设置费,因此你只需为实际交付的内容付费。
可靠且结果稳定。 每个个人资料都会以相同的字段结构返回;无法采集的 URL 会返回清晰的错误行,而不会导致整个运行失败。
已做好 MCP 接入准备。 可将其作为工具交由 Claude、Cursor 和其他 AI Agent 调用(见下方的安装部分)。
功能
核心功能
- 根据 URL 采集一个或多个公开的 LinkedIn 个人资料
- 姓名、标题、自我介绍、位置、当前公司和职位
- 完整的工作经历和教育经历
- 关注者和联系人数量、个人资料照片 URL、公开个人资料 URL
数据质量
- 每次都为每个个人资料返回一行格式一致的 JSON 数据
- 每行均包含通俗易懂的
summary字段,便于快速浏览和供 AI 使用 - 每个 URL 都会返回清晰的错误行,单个无效链接不会导致整个批次失败
使用示例
基本示例
{
  "profileUrls": ["https://www.linkedin.com/in/satyanadella"]
}
批量示例(并行采集)
{
  "profileUrls": [
    "https://www.linkedin.com/in/satyanadella",
    "https://www.linkedin.com/in/williamhgates"
  ]
}
输入参数
| 参数 | 类型 | 必填 | 默认值 | 说明 |
|---|---|---|---|---|
profileUrls | list[str] | 是 | - | 一个或多个公开的 LinkedIn /in/ 个人资料 URL。每次运行最多 1000 个;非 /in/ URL 会被跳过。 |
输出格式
每个个人资料均以一行 JSON 数据返回:
{
  "result_type": "profile",
  "name": "Satya Nadella",
  "headline": "Chairman and CEO at Microsoft",
  "currentCompany": "Microsoft",
  "currentTitle": "Chairman and CEO",
  "location": "Redmond, Washington, United States",
  "countryCode": "US",
  "followers": 12056751,
  "connections": 500,
  "pastCompanies": ["Microsoft", "University of Chicago", "Starbucks"],
  "education": [{ "title": "The University of Chicago Booth School of Business" }],
  "email": null,
  "publicUrl": "https://www.linkedin.com/in/satyanadella",
  "summary": "Chairman and CEO at Microsoft, based in Redmond, Washington, United States, 12,056,751 followers"
}
email 字段始终为 null;此来源不提供电子邮件地址。
常见问题
这会让我的 LinkedIn 或 LinkedIn Recruiter 账户面临风险吗?
不会。它只读取公开的 LinkedIn 页面,也就是任何人退出登录后都能打开的页面。它绝不会登录,也不会索要你的 Cookie:没有用于输入账户、密码或 li_at 会话 Cookie 的字段。它所做的一切都不会关联到你的 LinkedIn 账户、LinkedIn Recruiter 席位或 Sales Navigator 许可证。请求由 Apify 的服务器发出,而非你的浏览器,因此不会关联到你;运行期间,你也可以继续使用 Recruiter。
在 Claude Cowork Desktop 中安装
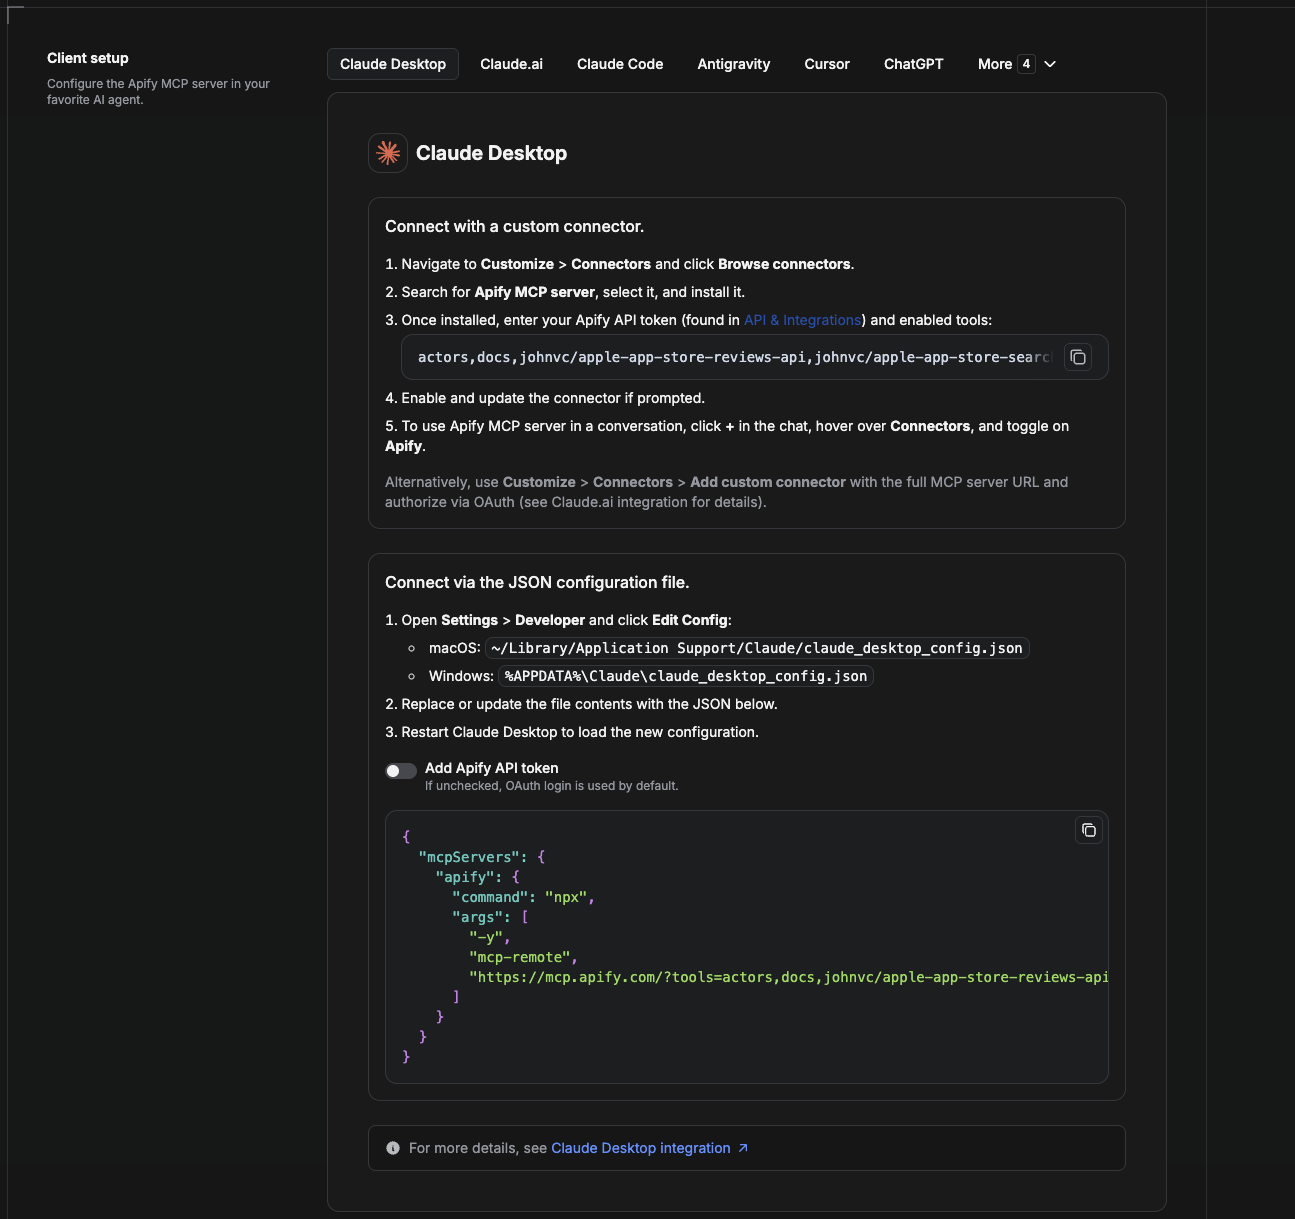
Cowork 是桌面应用的自动化模式。若要将 LinkedIn Profile API 添加为工具,请将 Apify MCP 服务添加为连接器。
- 打开 Claude 桌面应用,然后前往 Settings → Connectors(或前往 Settings → Developer → Edit Config,直接编辑
claude_desktop_config.json)。- macOS:
~/Library/Application Support/Claude/claude_desktop_config.json - Windows:
%APPDATA%\Claude\claude_desktop_config.json
- macOS:
- 添加 Apify MCP 服务,并且只预加载此 Actor:
{
  "mcpServers": {
    "apify": {
      "command": "npx",
      "args": [
        "-y",
        "mcp-remote",
        "https://mcp.apify.com/?tools=actors,docs,johnvc/linkedin-profile-api"
      ]
    }
  }
}
- 重启应用。Cowork 首次调用该工具时,请在浏览器中完成 OAuth 提示,或在连接器设置中添加 Apify API 令牌以跳过 OAuth。
- 在 Cowork 聊天中确认该工具可用,并让它运行 LinkedIn Profile API。
下载桌面应用并开始免费试用:https://claude.ai/referral/uIlpa7nPLg 更多帮助:https://docs.apify.com/platform/integrations/claude-desktop
在 Claude Code 中安装
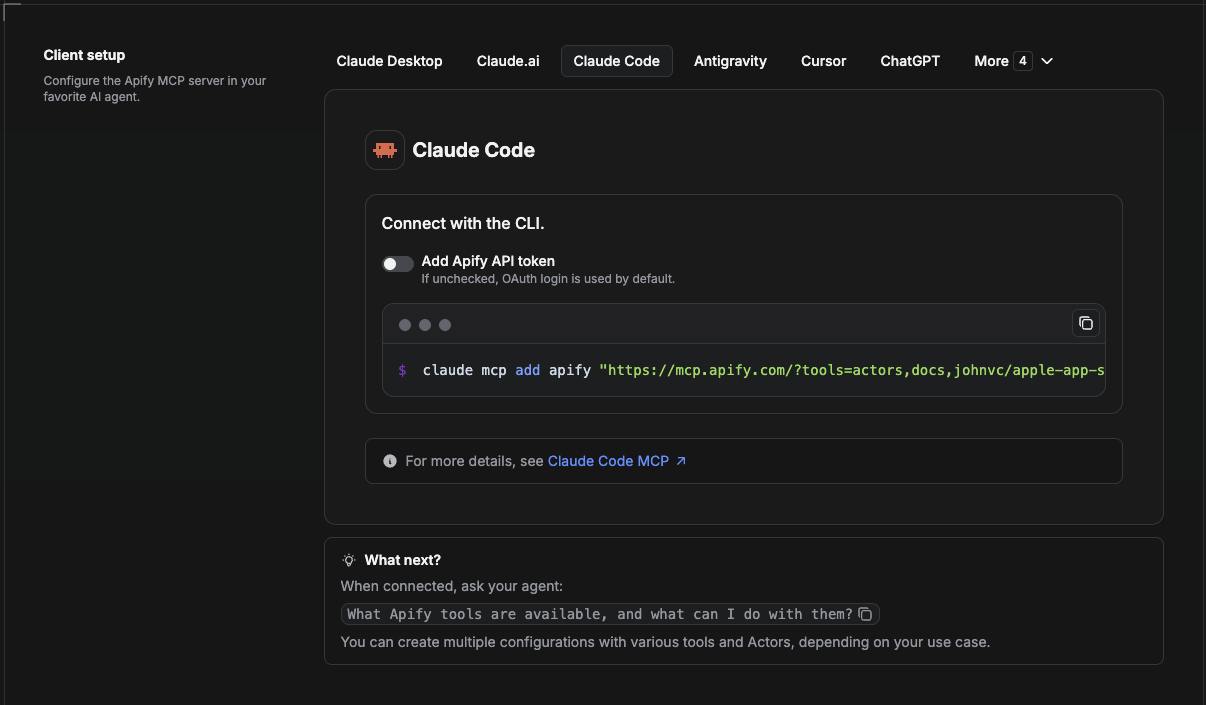
Claude Code 是命令行工具。使用一条命令添加 Actor 的 MCP 服务:
claude mcp add --transport http apify \
  "https://mcp.apify.com/?tools=actors,docs,johnvc/linkedin-profile-api"
如需使用令牌而非浏览器 OAuth:
claude mcp add --transport http apify \
  "https://mcp.apify.com/?tools=actors,docs,johnvc/linkedin-profile-api" \
  --header "Authorization: Bearer YOUR_APIFY_TOKEN"
然后使用 claude mcp list 验证,或在会话中运行 /mcp。让 Claude Code 调用 LinkedIn Profile API。
免费试用 Claude Code:https://claude.ai/referral/uIlpa7nPLg Claude Code MCP 文档:https://code.claude.com/docs/en/mcp
在 Claude(网站)中安装
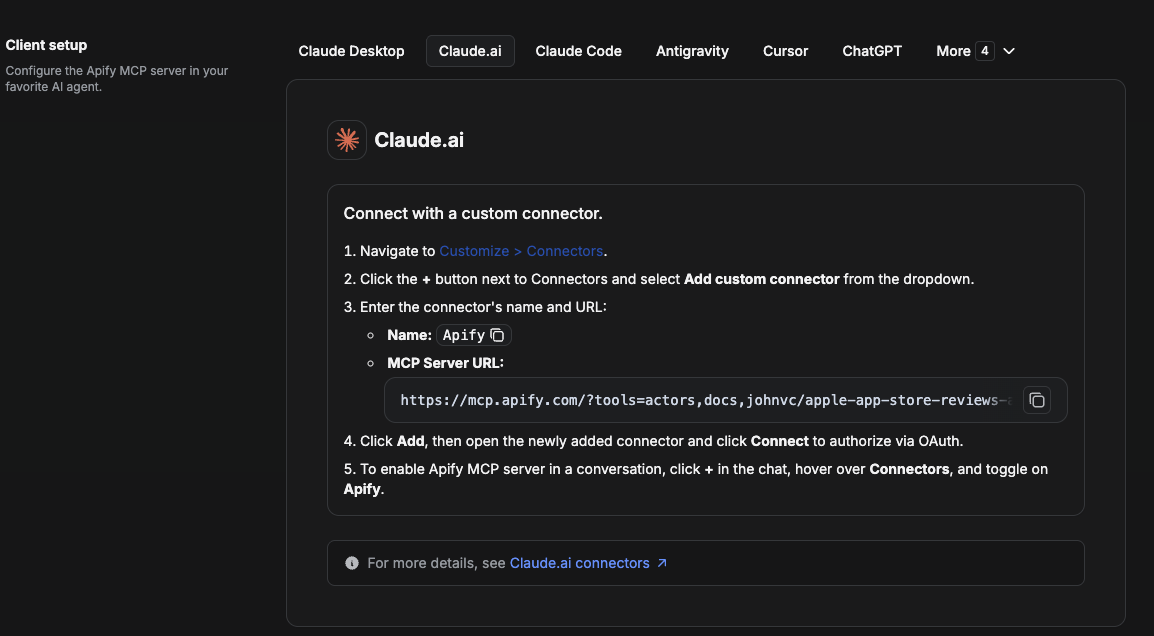
在 claude.ai 上,将 Apify 添加为连接器,然后只启用此 Actor 的工具。
- 前往 Settings → Connectors → Browse connectors,搜索 Apify MCP server。安装它(如果出现提示,请启用或更新)。
- 连接时,使用 Apify API 令牌进行身份验证,并启用工具
johnvc/linkedin-profile-api。 - 在任意聊天中,打开 + → Connectors 并开启 Apify。
- 或者,选择 Add custom connector 并粘贴完整的 MCP URL
https://mcp.apify.com/?tools=actors,docs,johnvc/linkedin-profile-api,并在出现提示时使用 OAuth。 - 让 Claude 运行 LinkedIn Profile API。
在网页上打开 Claude:https://claude.ai/referral/uIlpa7nPLg
在 Cursor 中安装
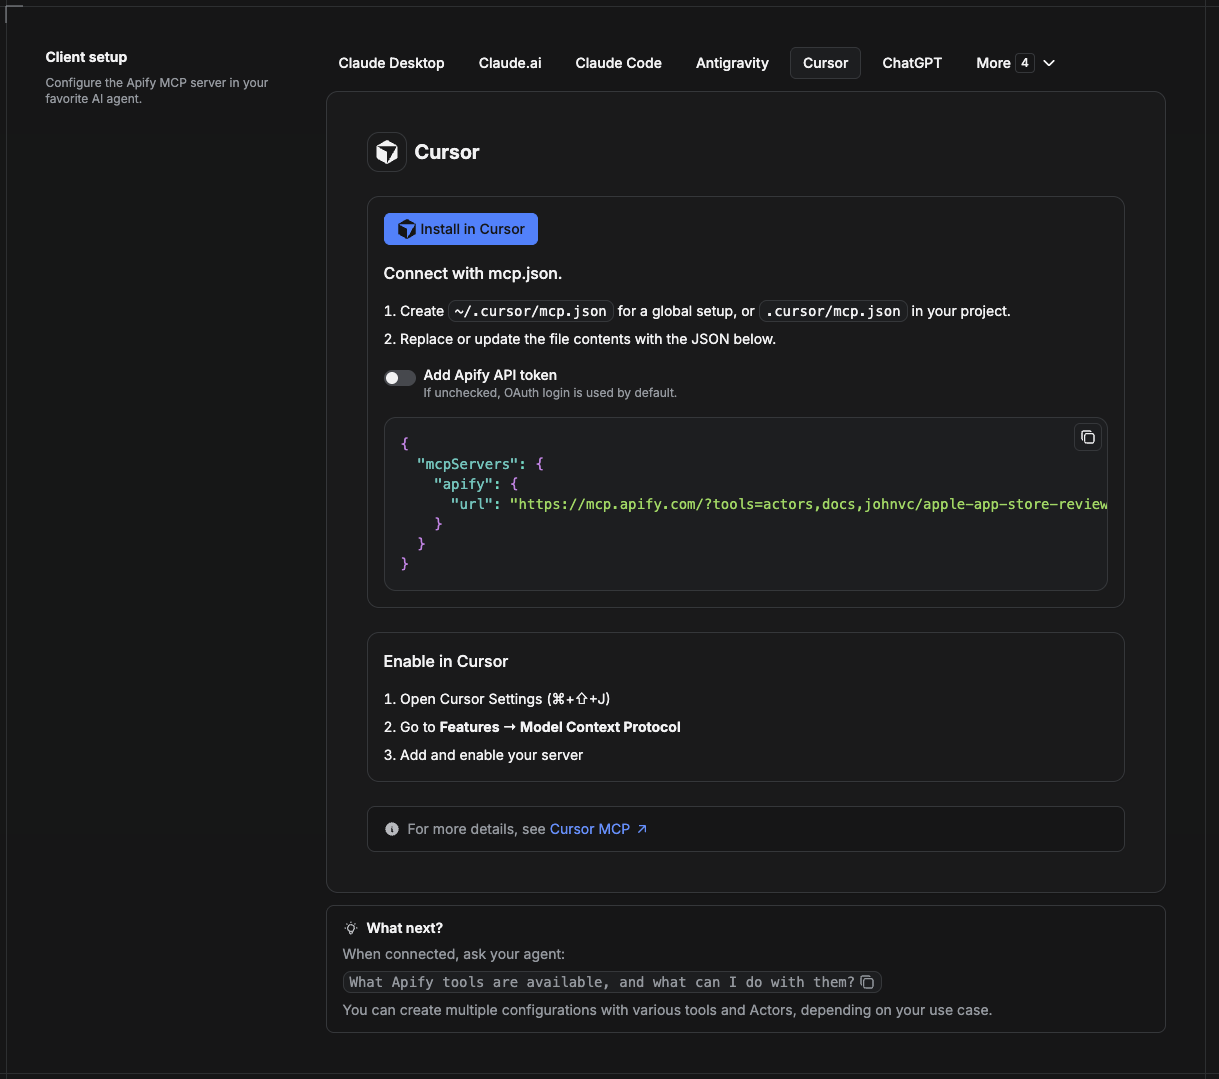
Cursor 从项目文件 .cursor/mcp.json 中读取 MCP 服务。
- 在项目中创建
.cursor/mcp.json:
{
  "mcpServers": {
    "apify": {
      "url": "https://mcp.apify.com/?tools=actors,docs,johnvc/linkedin-profile-api"
    }
  }
}
- 如果想使用令牌身份验证而非浏览器 OAuth,请添加一个请求头:
{
  "mcpServers": {
    "apify": {
      "url": "https://mcp.apify.com/?tools=actors,docs,johnvc/linkedin-profile-api",
      "headers": { "Authorization": "Bearer YOUR_APIFY_TOKEN" }
    }
  }
}
- 打开 Cursor → Settings → MCP,确认 apify 服务已连接(显示绿点)。
- 在 Composer 或 Chat 中,让 Cursor 调用 LinkedIn Profile API。
刚开始使用 Cursor?请从这里获取:https://cursor.com/referral?code=XQP4VBLI3NNX
在 ChatGPT 中安装
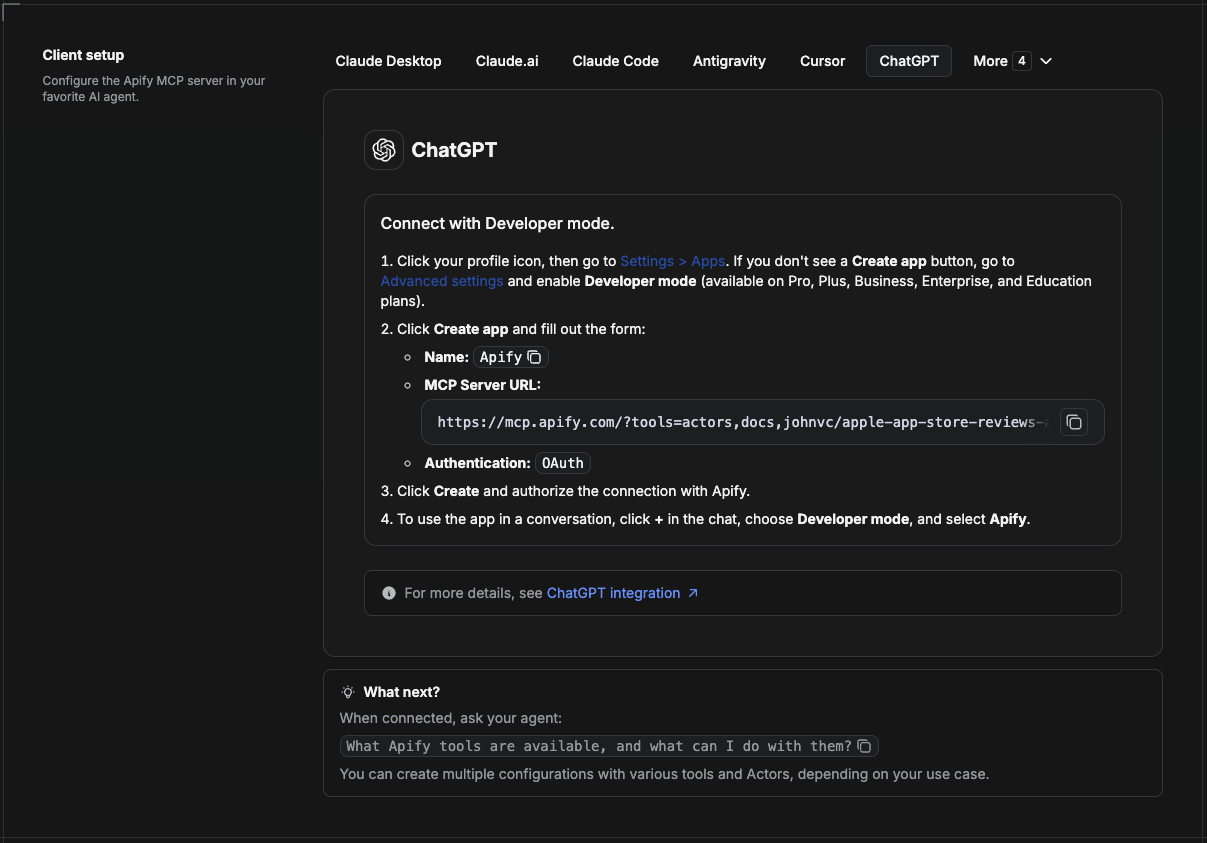
ChatGPT 通过开发者模式连接到 Apify MCP 服务(适用于 ChatGPT Pro、Plus、Business、Enterprise 和 Education 套餐)。
- 点击个人资料图标,然后前往 Settings > Apps。如果看不到 Create app 按钮,请打开 Advanced settings 并启用 Developer mode。
- 点击 Create app 并填写表单:
- 名称: Apify
- MCP 服务 URL:
https://mcp.apify.com/?tools=actors,docs,johnvc/linkedin-profile-api - 身份验证: OAuth
- 点击 Create,并使用 Apify 授权连接。
- 要在对话中使用此应用,请点击聊天中的 +,选择 Developer mode,然后选择 Apify。
更多帮助:https://docs.apify.com/platform/integrations/mcp
使用 LinkedIn Profile API,通过可靠、结构化的结果为数据工作流提供支持。
🤖 向 AI 助手咨询此 Actor
在你选择的 AI 中打开一条关于 LinkedIn Profile API 的即发提示词:
- 💬 ChatGPT
- 🧠 Claude
- 🔍 Perplexity
- 🅒 Copilot
最后更新:2026.10.27
评论
一个开放协议,规定了 AI 应用如何以统一方式连接外部工具与数据源。客户端负责与模型对话,MCP 服务负责提供工具、资源和提示模板,两者通过标准消息通信,同一个服务可以被不同客户端复用。